User Tools
Programming Setup
(Note: The following instructions are for using the Arduino IDE for programming. You can also write your code in MicroPython or CircuitPython if you have experience with those.)
This document will walk through the steps to set up a programming environment using the Arduino IED if you want to load your own code.
You will need to install the Arduino IDE. Download it here: https://www.arduino.cc/en/software
Once you have the Arduino IDE installed and running we'll get the environment set up.
Before we do that, we'll cover how to get the device seen by your computer.
Depending on the device you have you may need to insert a paperclip and hold down a button or you will need to open the bottom using a Phillips screwdriver, locate a small PCB wrapped in blue tape, and then press a black dot on the tape. (See the Firmware Update Guide for more info.)
You will need to hold this reset button down while plugging the USB cable into your computer. Wait a few seconds after you plug it in and then release the button.
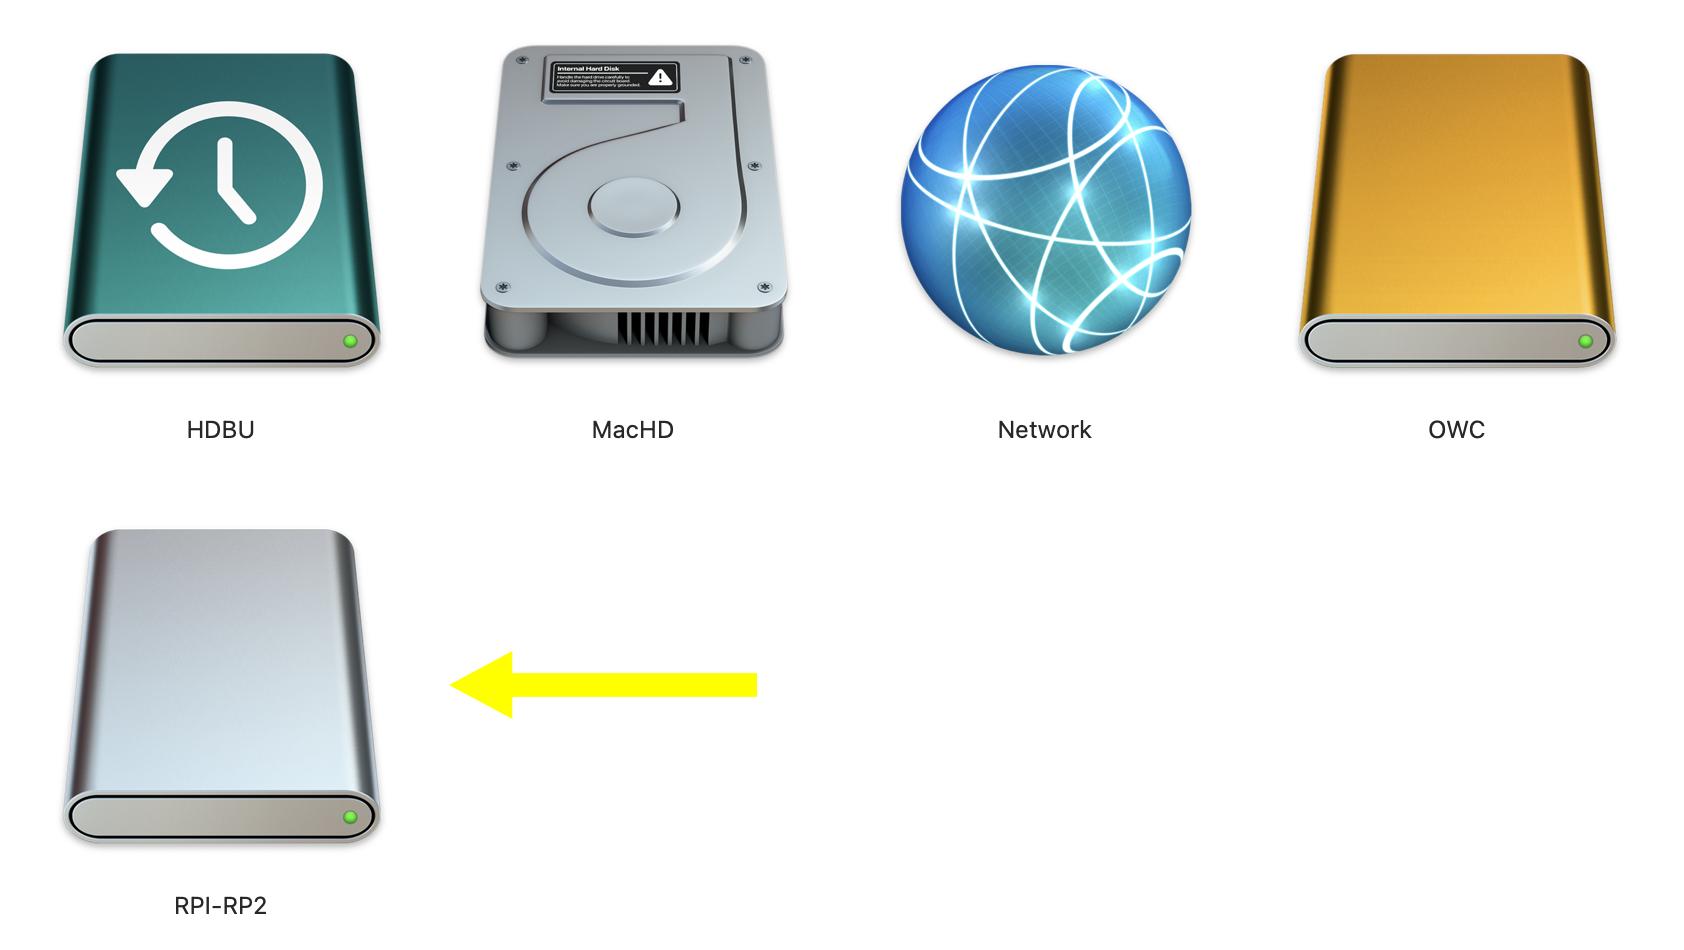
You should see a new drive appear on your computer. It will be named RPI-RP2.
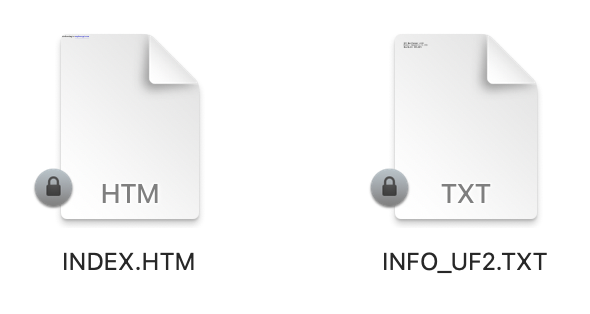
The drive will contain two files. Ignore the files, do not delete or attempt to edit them.
Next we're going to load the needed Board Manager files.
Open the Preferences for the Arduino IDE.

In the Settings panel you'll see a section titled Additional board manager URLs:
Click the button at the right side of that…
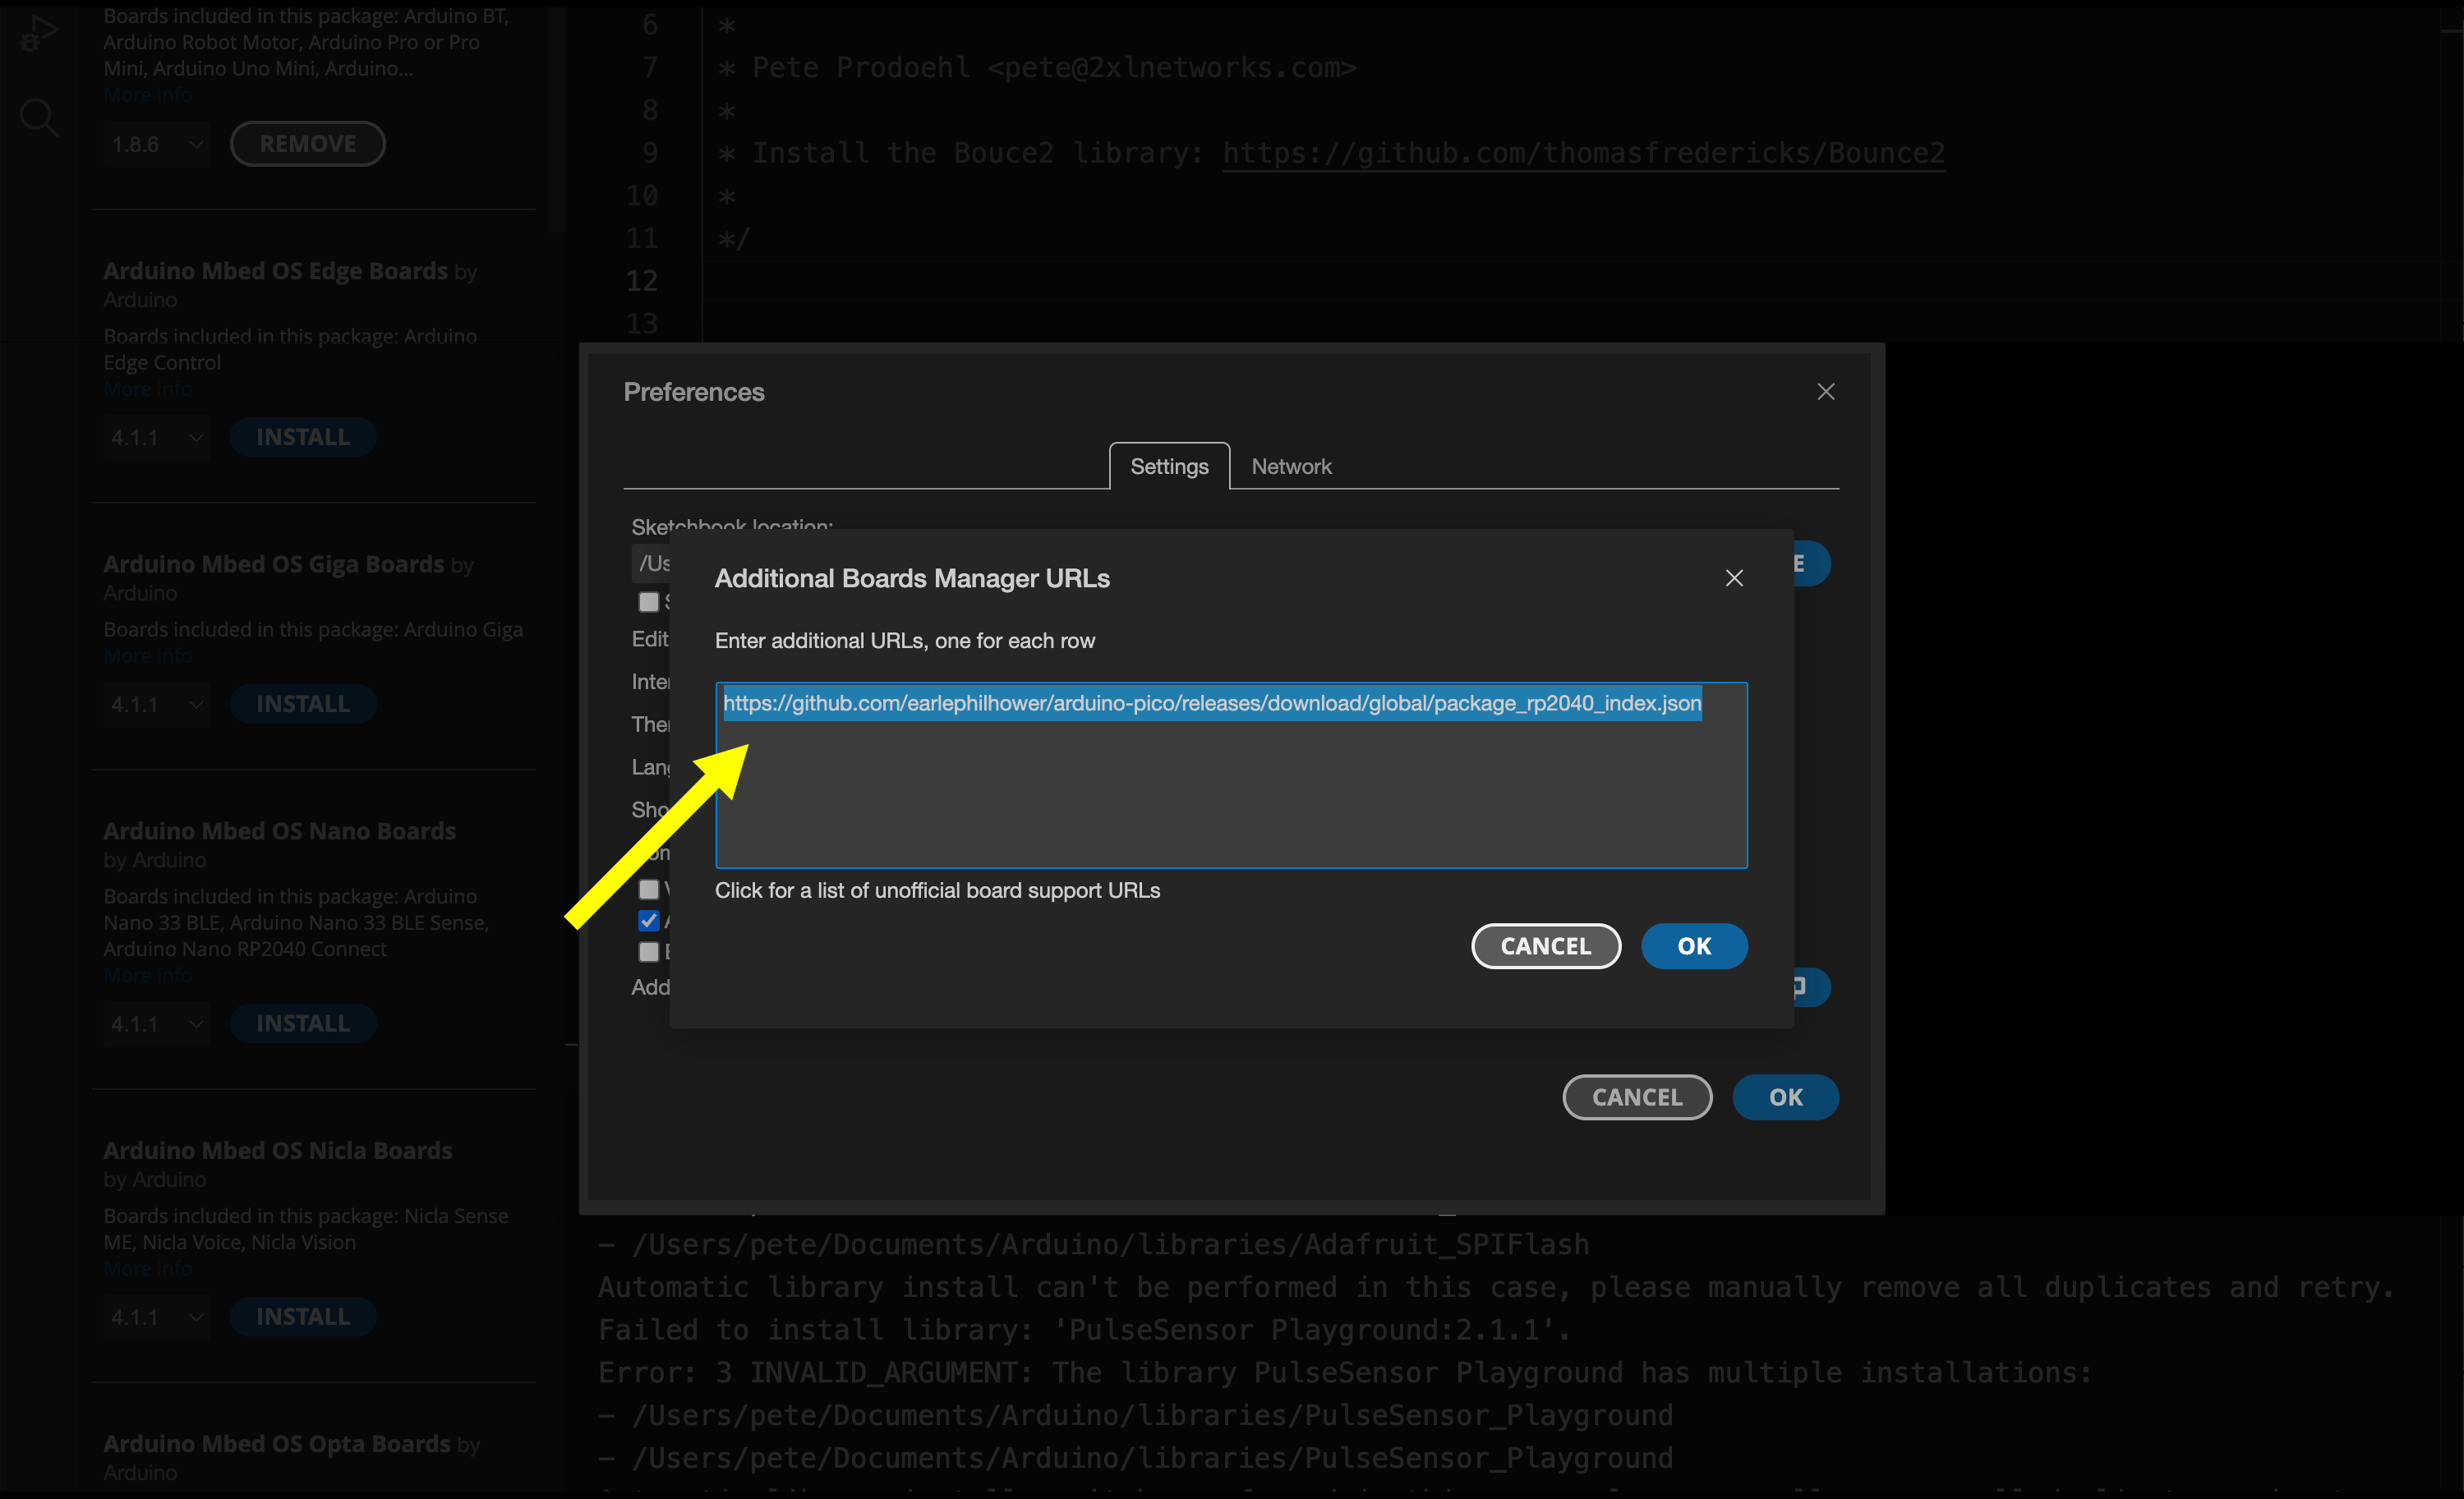
Paste the following URL into the text area and click the OK button.
https://github.com/earlephilhower/arduino-pico/releases/download/global/package_rp2040_index.json
Close out the Preferences panel and go back to the main application window.
This will allow us to load the RP2040 support files.
Click the Boards Manager icon on the left side. It should be the second from the top.

Type “Philhower” into the search box and you should see the Raspberry Pi Pico/RP2040 by Earle F. Philhower, III appear.
Click the INSTALL button.
Note that in the screenshot it shows a REMOVE button as I already have it installed. If it shows REMOVE for you as well then congrats! It's already installed.
Next we're going to install the Bounce2 library.
Click the Library Manager icon on the left side. It should be the third from the top.

Type “bounce2” into the search box and you should see the Bounce2 by Thomas O Fredericks appear.
Click the INSTALL button.
Once it is installed you can close the side panel.
We've got things setup and now we can prepare to program the board.
First we need to select the correct board.
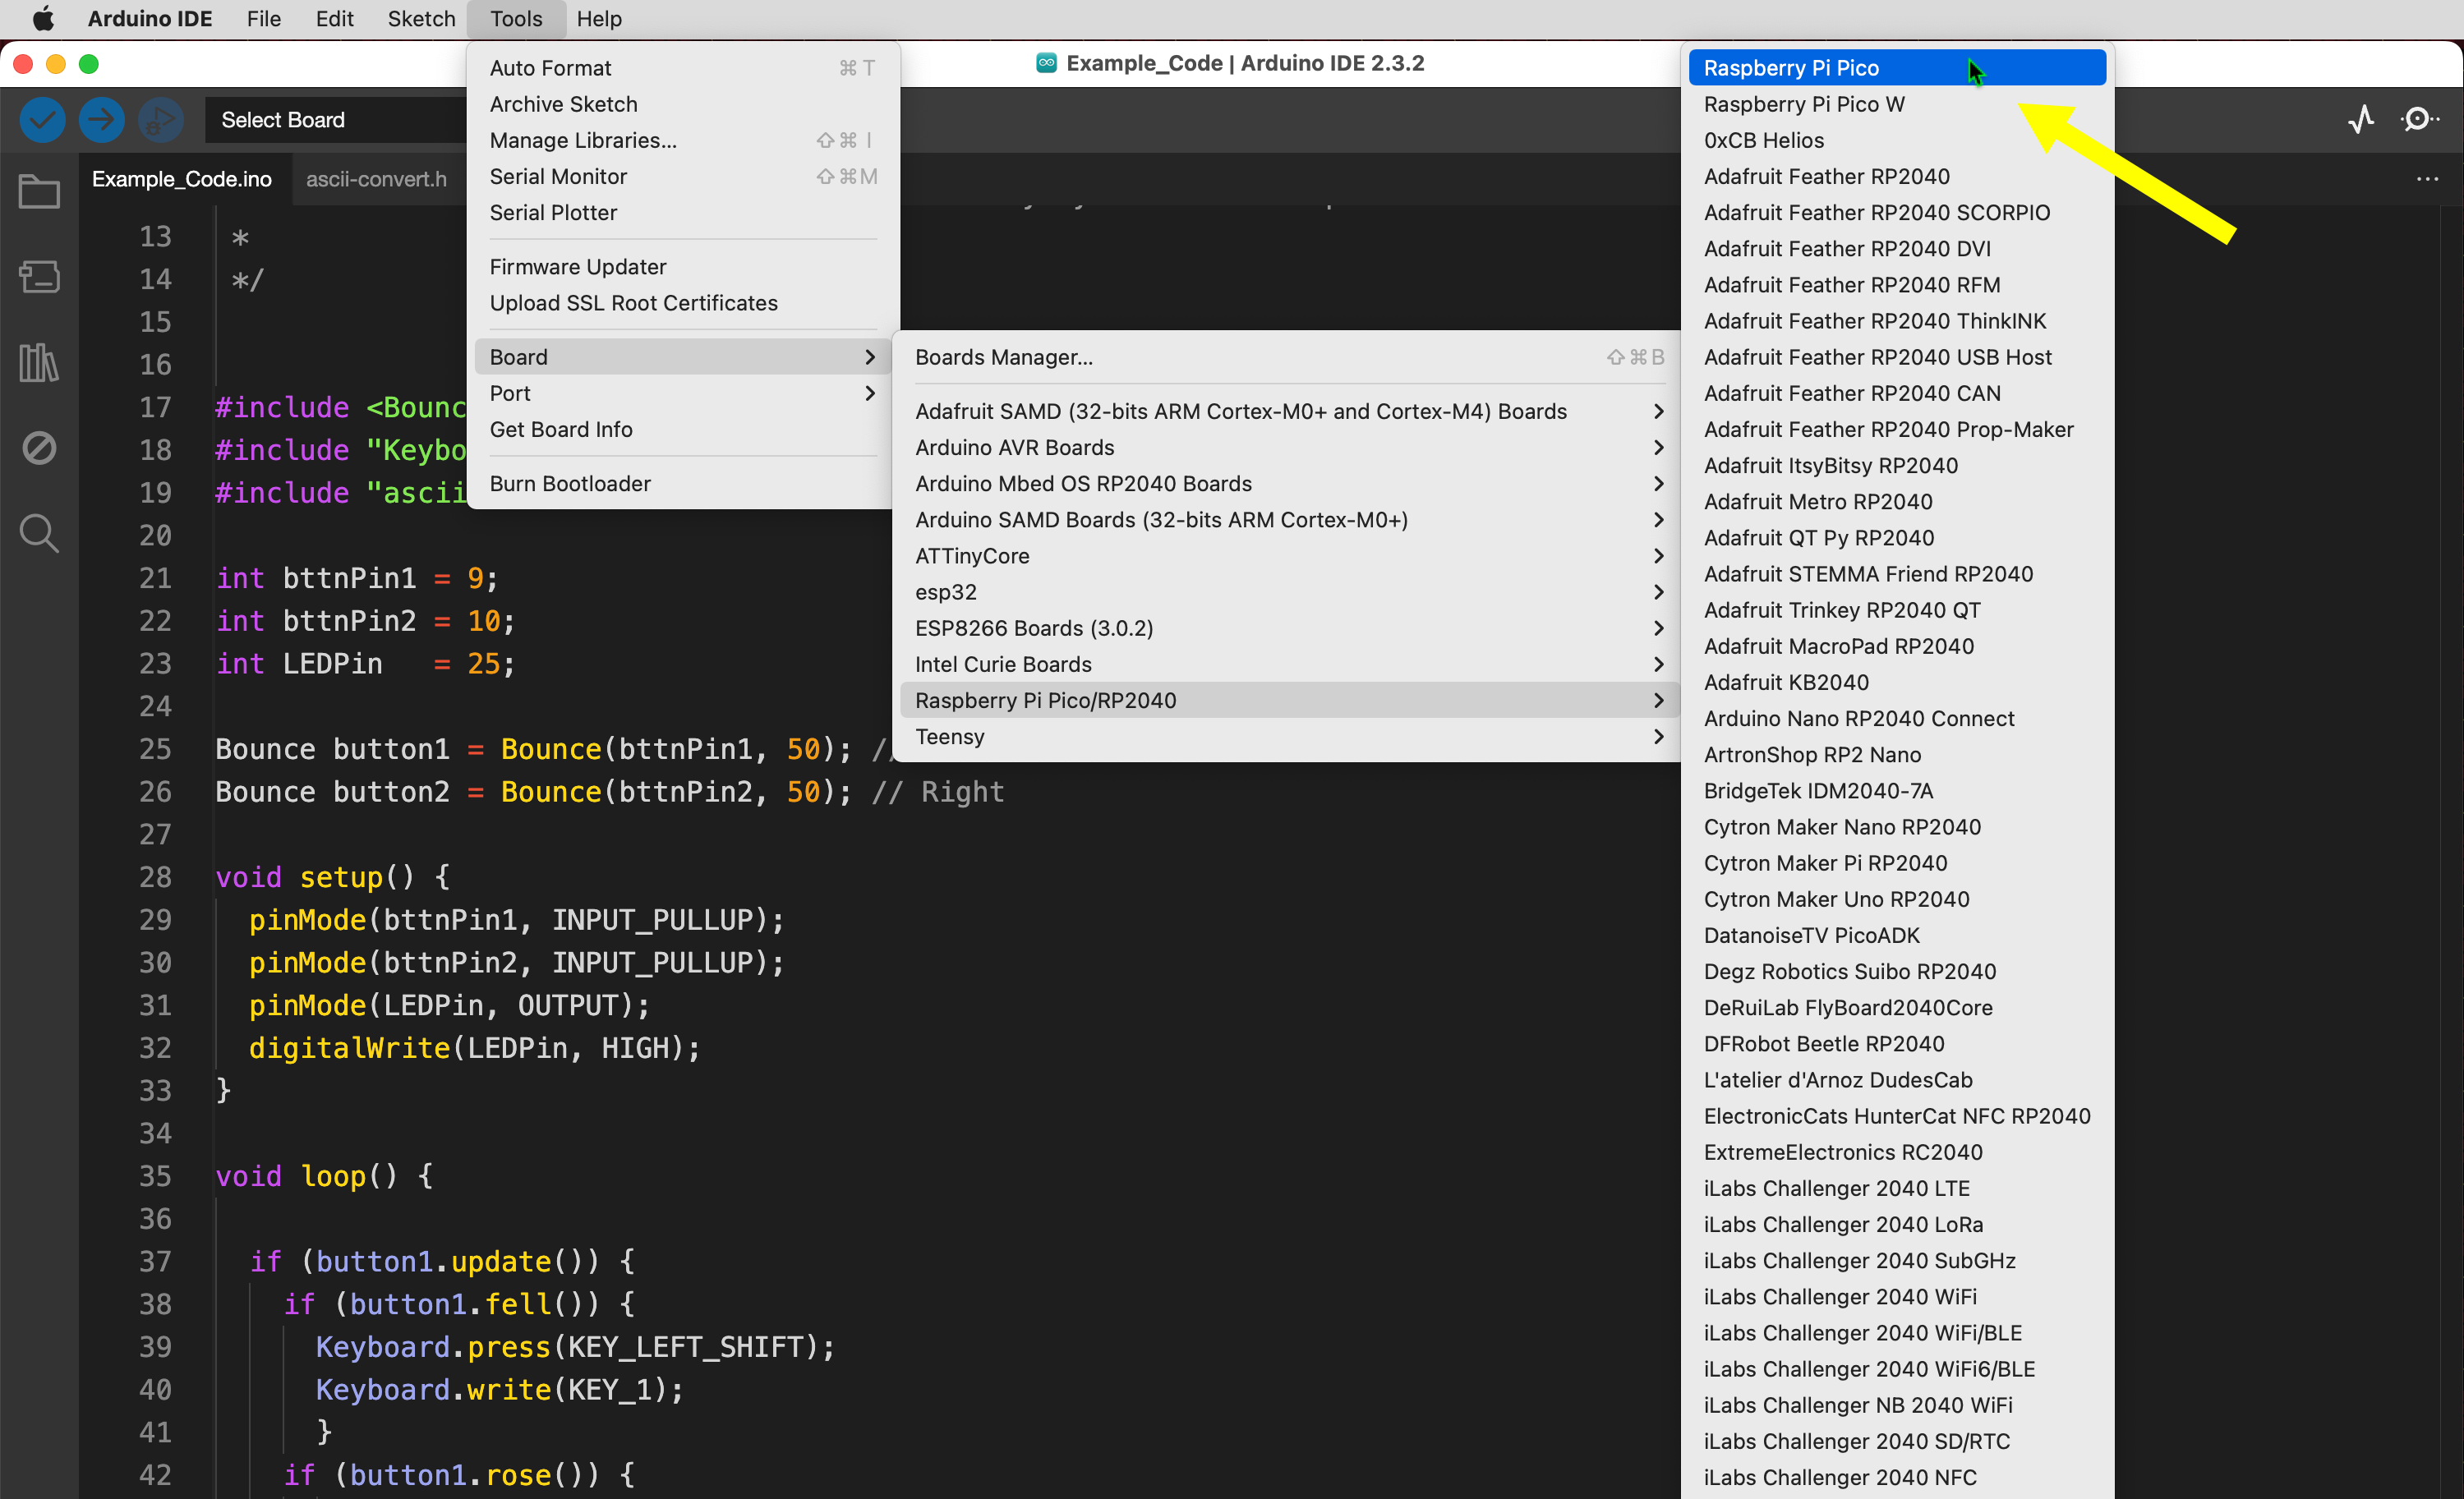
Under the Tools menu select Boards and then Raspberry Pi Pico/RP2040 and finally Raspberry Pi Pico.
Now we'll select the port. Since we pressed the reset button to get the board to mount as a UF2 drive we'll select that.

Under the Tools menu select Port and then UF2 Board.
Finally if you are programming the device as a keyboard, mouse, or joystick/game controller you can use the Pico SDK.
(If you want a USB MIDI device Adafruit TinyUSB is the option to choose.)
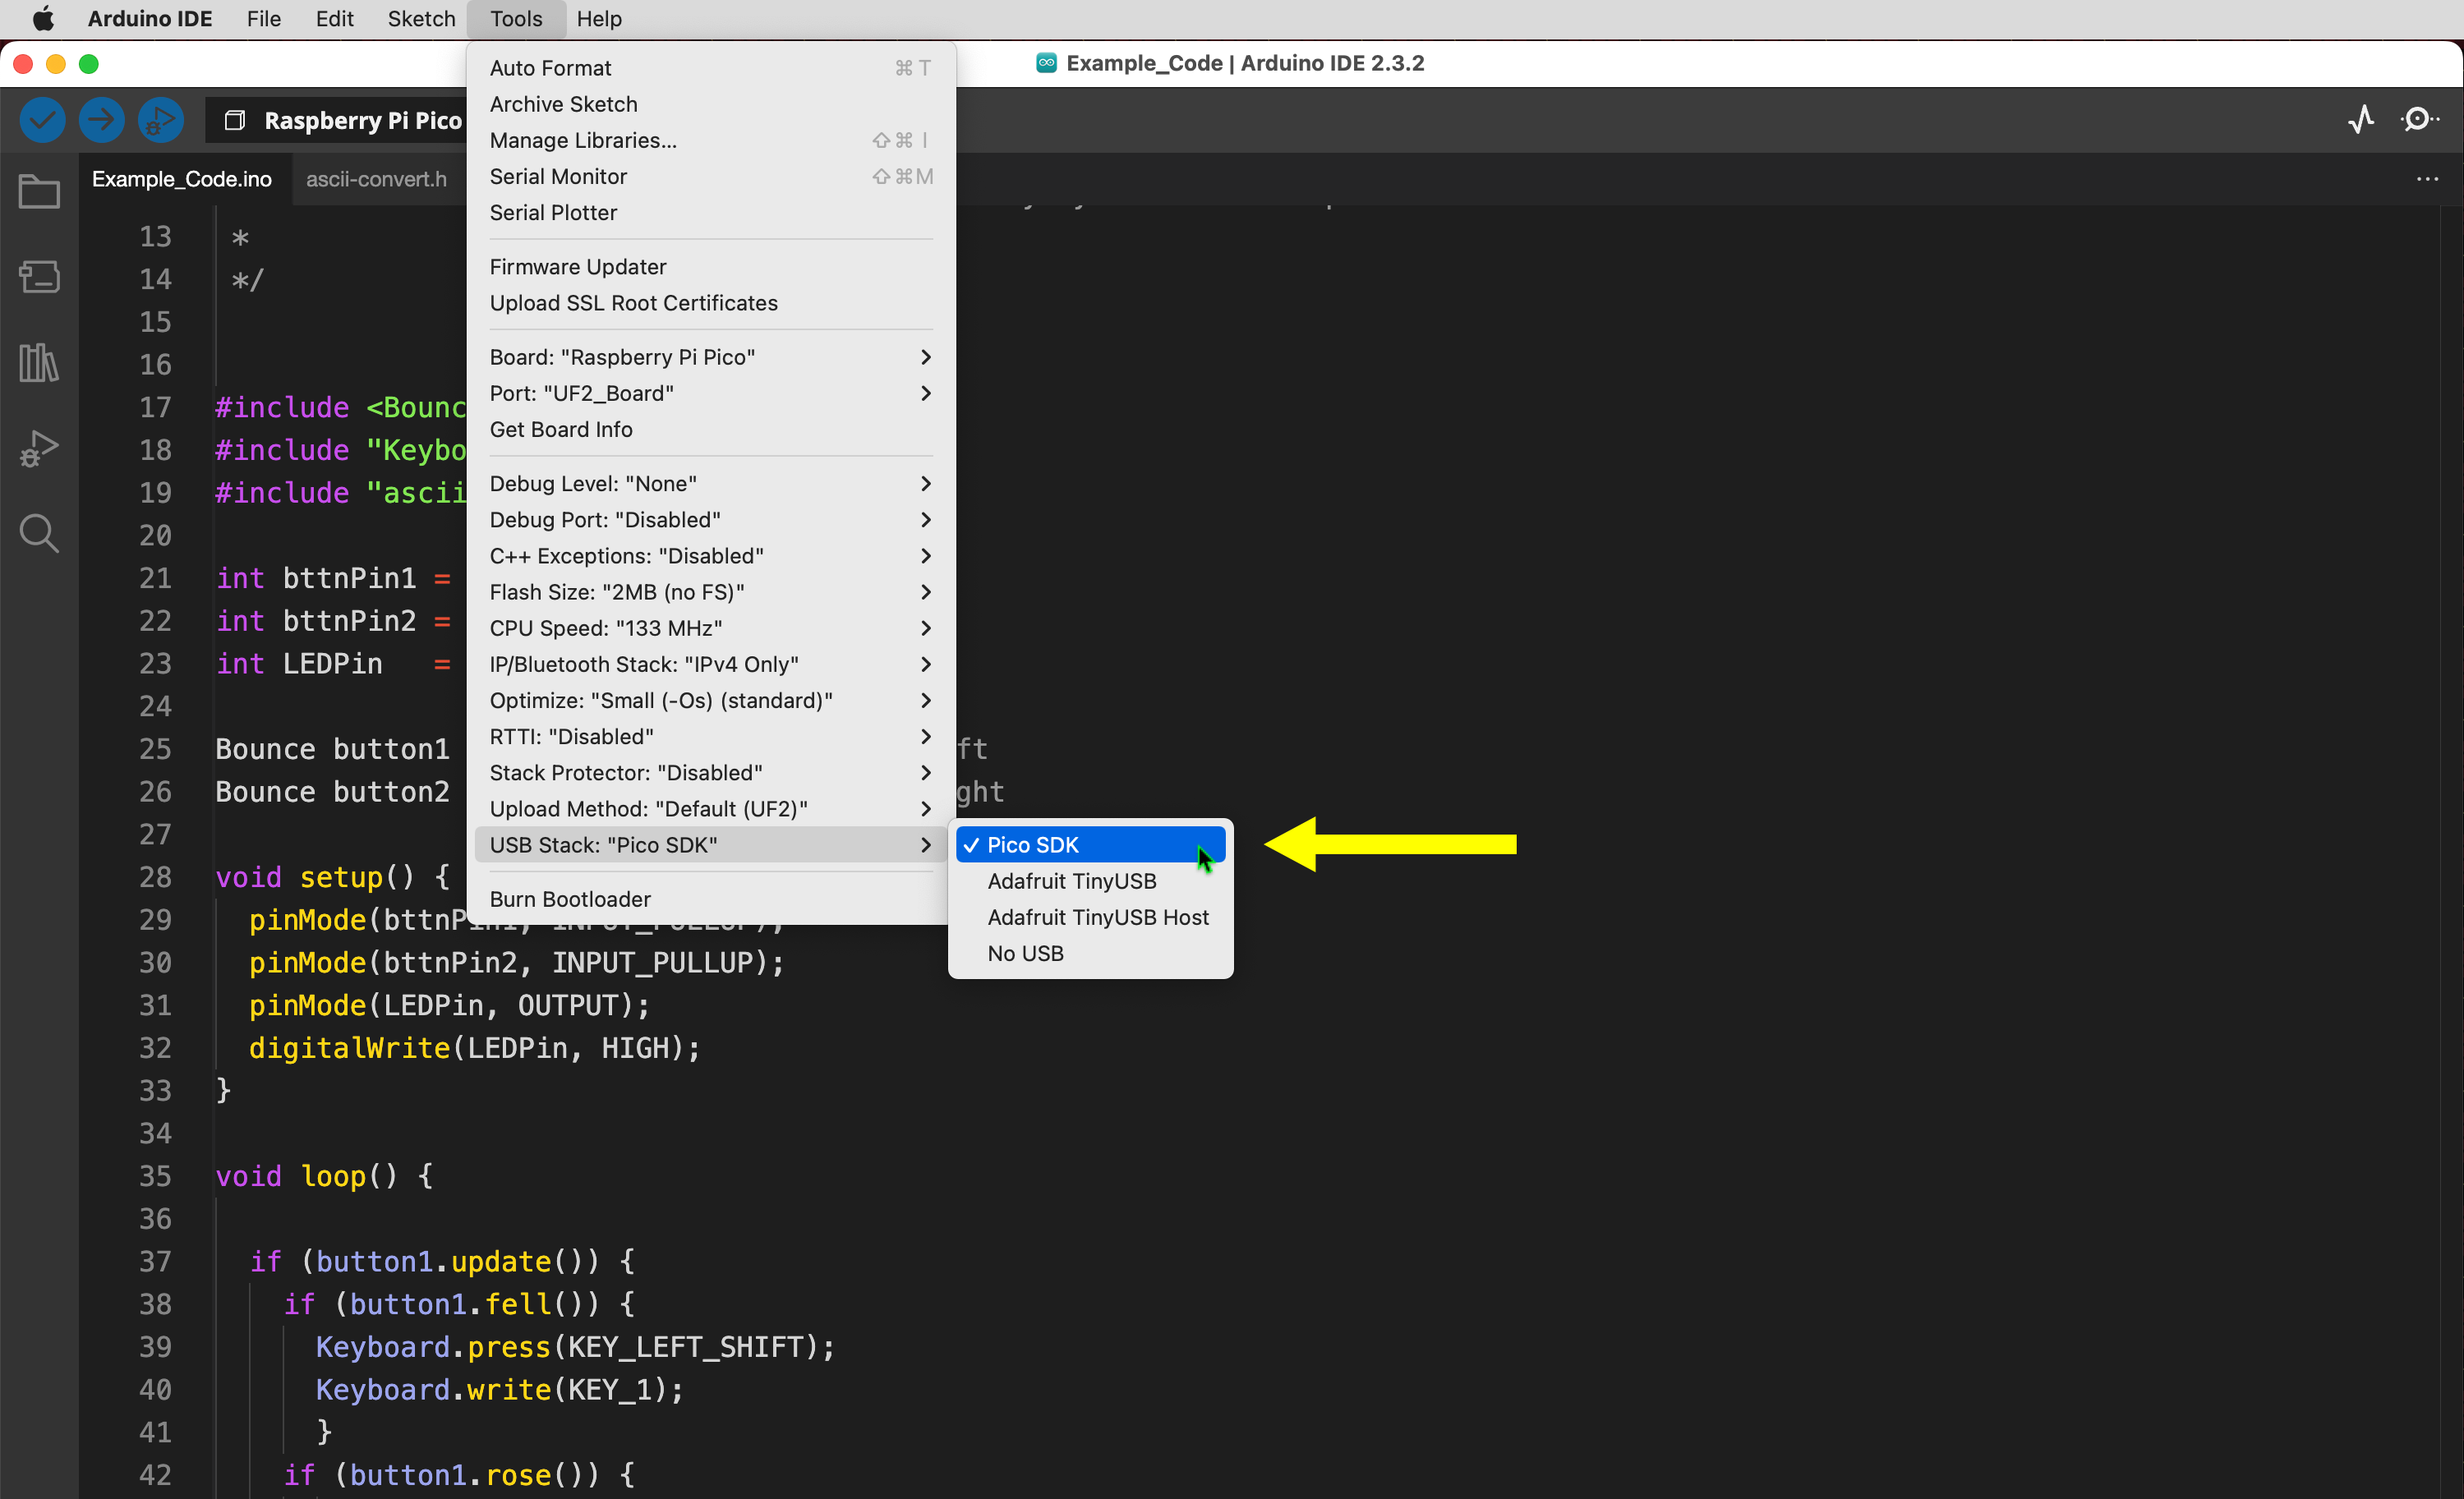
Under the Tools menu select USB Stack and then Pico SDK.
We are ready to load the code!
Download this example_code.zip to get started.

Once you have your code ready you can upload it to the board. Use the Upload button found in the upper left part of the application window. (It looks like an arrow pointing to the right.)